“`html
How to Install a Drip Irrigation System
Introduction: Implementing a drip irrigation system is a smart choice for efficient water usage and gardening success. This blog post explores the necessary steps to install such a system, delivering water directly to the roots of your plants. From understanding the components and benefits to detailed planning and installation, we’ll guide you through this sustainable watering solution. Join us as we explore each stage, from connecting to your water source, laying the main tubing, to fine-tuning your system. We will also cover maintenance tips and troubleshooting common problems to ensure your garden flourishes year-round.
Project details
Installing a drip irrigation system in your garden is an efficient way to water plants while conserving water. With a strategic approach, you can enhance the growth and health of your garden. This project involves understanding various components and planning the layout to suit your specific needs.
This guide will take you through each stage of the installation process, ensuring that your system is both effective and durable. By the end of this project, you will be equipped with the knowledge needed to manage and maintain a thriving garden with minimal water wastage.
Understanding Drip Irrigation Systems
Benefits of Drip Irrigation
Drip irrigation systems offer numerous benefits, making them an attractive choice for gardeners and landscapers. They provide water directly to the plant’s root zone, leading to effective water use and reduced evaporation. This targeted watering method helps prevent common issues like leaf disease and weed growth by minimizing water contact with foliage and non-target areas.
Additionally, drip irrigation systems are highly versatile and can be customized to suit various plant types and garden layouts. Whether managing a small home garden or a large agricultural area, drip irrigation systems offer a sustainable and efficient watering solution that can reduce water bills and labor associated with manual watering.
Components of a Drip Irrigation System
The core components of a drip irrigation system include the main water supply line, tubing, emitters, connectors, and optional timers. The main line connects to your water source, distributing water through the network of tubing that reaches your plants.
Emitters regulate the water flow at intervals along the tubing, ensuring each plant receives the right amount of water. Connectors and fittings join different sections of tubing, allowing flexibility in your system’s layout. Optional components like timers can automate watering schedules, further enhancing efficiency and ease of use.
Planning Your Drip Irrigation Layout
Mapping Your Garden
Before installation, planning your drip irrigation layout is crucial. Start by mapping your garden to identify areas that require watering. Take note of the types of plants and their specific water needs, allowing you to tailor the system to deliver precise amounts.
Create a scaled drawing of your garden, marking plant locations and distances. This visual aid will help you determine the length of tubing required and the number of emitters needed for each section. Planning helps maximize water efficiency and ensures your irrigation system meets the unique needs of your garden.
Calculating Water Needs
Understanding the water requirements of your plants is essential for designing an effective drip irrigation system. Each plant species has different water demands, influenced by factors like soil type, climate, and growth stage.
Research the specific needs of your plants and calculate the water flow rates needed for each zone of your garden. This calculation will guide you in selecting the right emitters and configuring your system to deliver water at scheduled intervals, ensuring optimal plant health and growth.
Gathering Tools and Materials for Your Drip Irrigation System
Essential Tools
Having the right tools on hand will make the installation process smoother and more efficient. Some essential tools include a garden hose timer, hole punch, tubing cutter, and a measuring tape. These tools help you accurately cut tubing, make connections, and set up the system to suit your garden layout.
Additionally, consider having garden stakes and a toolbelt to keep everything organized as you work. Preparing these tools beforehand ensures that you’re ready to tackle each step without unnecessary delays.
Required Materials
Materials you’ll need for your drip irrigation system include polyethylene tubing, emitters, connectors, pressure regulators, filters, and a backflow preventer. Each component plays a vital role in ensuring the system operates effectively and efficiently.
Additionally, optional materials such as micro-sprayers can be included for areas with broader plant coverage. Carefully selecting high-quality materials will ensure durability and long-term success in your garden irrigation project.
Connecting To Your Water Source
Installing a Backflow Preventer
A backflow preventer is a crucial component that protects your water supply from contamination. Installing it at the water source is a simple but vital step, ensuring that any backflow, which could introduce contaminants, is prevented.
Attach the backflow preventer directly to your outdoor faucet. This device ensures that the irrigation water does not return into your freshwater sources, safeguarding both your plants and household water quality.
Attaching the Pressure Regulator and Filter
A pressure regulator and filter are essential for maintaining optimal water flow through your irrigation system. High water pressure can damage the tubing and emitters, so a pressure regulator is necessary to lower and stabilize the water pressure within safe limits.
The filter prevents debris and sediment from entering the system, which could clog emitters and disrupt water distribution. After attaching the backflow preventer, connect the pressure regulator and filter to the faucet, ensuring secure fittings for long-term durability.
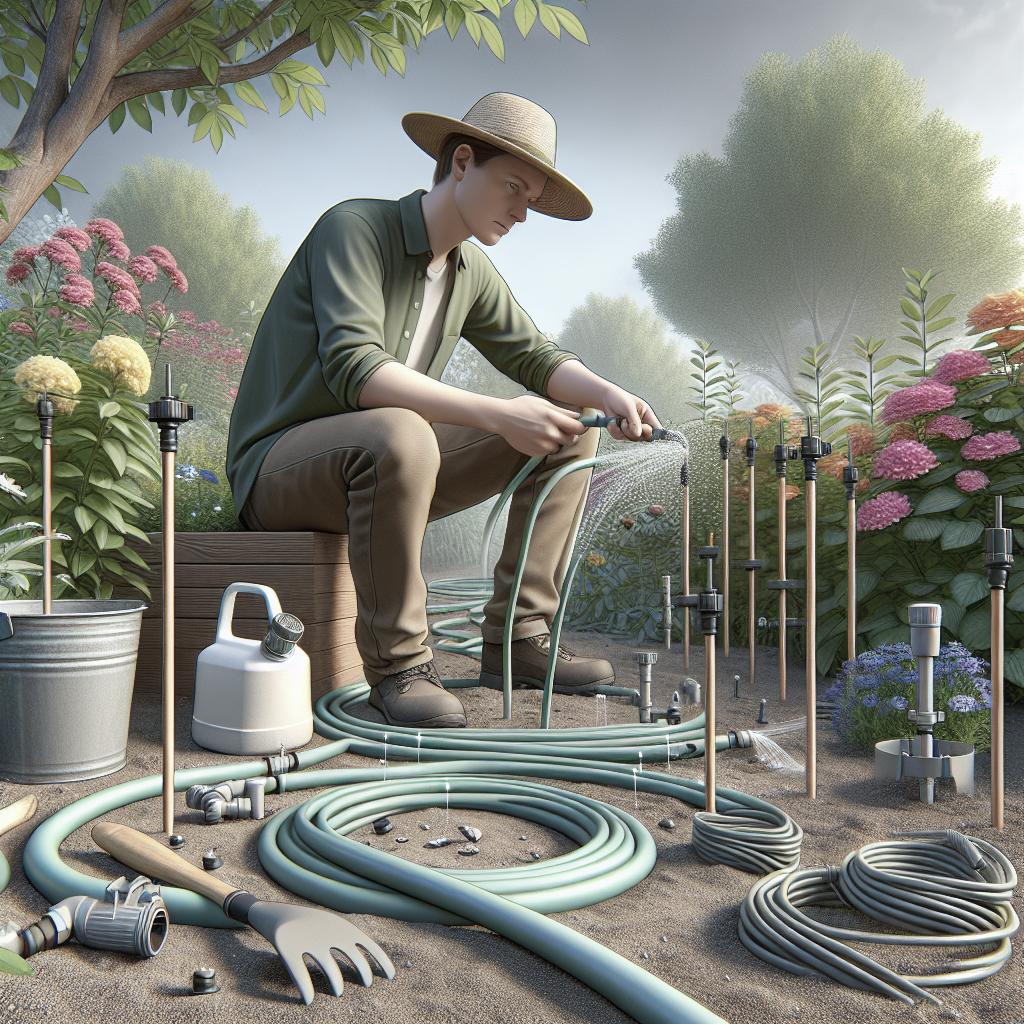
Laying Out the Main Tubing
Positioning the Main Line
Once connected to your water source, it’s time to lay out your main tubing or garden hose along the planned irrigation paths. Consider environmental factors like soil texture and terrain to adjust the tubing path for maximum efficiency.
Remember to keep the main tubing close to the plant beds or rows. If using stakes, secure the tubing in place to prevent movement and ensure accurate water application. Take the time to evaluate plant proximity, ensuring that no more than an appropriate distance from plants to the main line exists.
Using Connectors and Fittings
Connectors and fittings allow you to branch the main tubing into secondary lines, reaching different parts of your garden. Use tees, elbows, and couplers to maneuver around corners or change direction as needed.
To avoid leaks, ensure each connection is properly tightened and secured. These fittings ensure an adaptable system that is capable of covering your entire garden without the need for excess tubing.
Installing Emitters and Micro-Sprayers
Placing Emitters for Individual Plants
Emitters are the final delivery point for water and need to be placed accurately for individual plant watering. Use a hole punch to make openings in the tubing, then insert the emitters where plants are concentrated.
The spacing will vary based on plant types and water needs. For example, larger plants may require two or more emitters close to the stem, while smaller plants might thrive with a single emitter nearby, optimizing water use and growing conditions.
Setting Up Micro-Sprayers for Ground Cover
Micro-sprayers are ideal for areas with ground cover plants that spread out over a larger area. They distribute water more broadly than emitters, making them perfect for delivering adequate moisture to ground covers or flower beds.
Install micro-sprayers along the main tubing where coverage is necessary. Adjust the spray radius and patterns based on the specific needs of your garden plants to ensure sufficient irrigation coverage across the affected areas.
Securing and Fine-Tuning Your Drip Irrigation System
Using Ground Stakes
Ground stakes are useful for securing tubing in place along your irrigation path. They prevent the tubing from shifting, which can disrupt the watering pattern and reduce efficiency.
Place stakes at regular intervals or near fittings and emitters to ensure a tight system that remains stable and functional over time. Quality stakes offer consistent performance even during weather changes or planting relocations.
Adjusting Water Flow
Fine-tuning your irrigation system involves adjusting the water flow rate through emitters and micro-sprayers. As plants grow and change, their water needs may increase or decrease, so adaptability is key.
Test each section of your garden to ensure proper water delivery, adjusting the emitters and sprayers as needed. This ongoing process helps maintain optimal plant hydration while conserving water effectively.
Watering Trees and Shrubs
Creating Emitter Loops
Trees and large shrubs require more water compared to smaller plants and thus benefit from emitter loops. These loops encircle the base of the tree, ensuring water reaches the extensive root zones.
For large trees, use multiple loops and place emitters along the tubing to distribute water evenly. Carefully plan loop size and spacing based on the tree’s size and the proximity of other plants.
Customizing for Different Plant Sizes
Different plant sizes warrant customized drip irrigation setups to meet their unique water demands. Smaller plants may only need a single emitter, whereas large shrubs or trees need multiple emitters for full coverage.
Examine the canopy and root area of individual plants to determine how to tailor your irrigation system for their specific growth patterns and water requirements.
Finishing Touches
Flushing the System
Before using your new drip irrigation system, flushing the lines is crucial to remove any debris or particles that might have accumulated during installation. Open the line ends and let water run through for a few minutes.
This step is important to prevent initial blockages or clogs that can affect performance and plant health, ensuring a clean and efficient system start.
Sealing Tubing Ends
Sealing tubing ends is the final step in securing your drip irrigation setup. Use end caps to close tubing sections, preventing water from leaking out and ensuring pressure balance.
Regularly check these seals to make sure they remain secure, especially after seasonal changes or heavy use. Keeping the ends properly capped avoids unnecessary wastage and enhances overall system consistency.
Maintaining Your Drip Irrigation System
Regular Inspection Tips
Routine inspection of your drip irrigation system is key to its long-term performance. Check the tubing, emitters, and connections for signs of wear or damage to address any issues quickly.
Monitoring water flow and checking for clogs or leaks ensures that your system remains effective, preventing problems that can hinder plant growth and water usage efficiency.
Winterizing Your System
If you live in an area prone to freezing temperatures, winterizing your drip irrigation system is necessary to avoid damage. This involves draining water, removing timers, and storing removable parts indoors.
Proper winterization minimizes the risk of tubing cracks or equipment breakdown, allowing for a seamless reactivation when warm weather returns, saving both time and resources.
Troubleshooting Common Issues with Drip Irrigation
Dealing with Clogs
Clogs are a common issue in drip irrigation systems, often caused by debris or mineral buildup. Regularly check emitters and flush the system to prevent or resolve these problems.
If clogs persist, consider installing finer filters or using commercial cleaning solutions designed for irrigation systems, ensuring reliability and consistent water distribution.
Fixing Leaks and Breaks
Leaks and breaks in tubing or connections can significantly impact efficiency. Inspect the entire setup regularly, and repair any damaged sections using appropriate fittings.
Accurate diagnosis and prompt repairs help maintain your system’s integrity and ensure your plants receive adequate water, sustaining healthy growth and reducing water wastage.
Drip Irrigation Installation: Our Conclusion
Installing a drip irrigation system can transform your garden’s water usage and plant health. By following these detailed steps, from understanding system components to final touches and troubleshooting, you’ll establish an efficient, low-maintenance watering solution. As technology advances, future options might include smarter, automated systems for even more customized and sustainable gardening. With consistent care and early problem resolution, drip irrigation systems remain valuable tools for any gardener looking to cultivate a vibrant, thriving garden. Embrace these sustainable watering practices, and your garden will thank you with a bountiful display of growth.
Next Up In Landscaping
Looking forward to more improvements in your yard? Our next piece will dive into landscape lighting systems and how they can enhance your garden’s aesthetic and functionality. Discover the best options for creating a captivating nocturnal garden scene that extends the beauty and enjoyment of your outdoor space into the evening hours. Stay tuned for innovative ideas and practical tips on incorporating lighting designs that complement your new drip irrigation system.
| Section | Summary |
|---|---|
| Project details | Overview of the drip irrigation installation, outlining the goals and process. |
| Understanding Drip Irrigation Systems | Discussion on benefits and components crucial for effective irrigation. |
| Planning Your Drip Irrigation Layout | A step-by-step guide on mapping the garden and calculating water needs. |
| Gathering Tools and Materials | List of tools and materials required for a successful installation. |
| Connecting To Your Water Source | Instructions on installing basic components to connect the water source. |
| Laying Out the Main Tubing | Guidance on placing main tubing and using connectors for layout efficiency. |
| Installing Emitters and Micro-Sprayers | Tips for positioning emitters and micro-sprayers for optimal plant water access. |
| Securing and Fine-Tuning | How to secure the setup and adjust water flow to meet garden needs. |
| Watering Trees and Shrubs | Strategies for effectively delivering water to larger plants and trees. |
| Finishing Touches | Final steps to ready the system, such as flushing and sealing ends. |
| Maintaining Your System | Maintenance tips for regular performance checks and seasonal care. |
| Troubleshooting Common Issues | Solutions for frequent problems like clogs, leaks, and breaks. |
| Drip Irrigation Installation: Our Conclusion | Final thoughts on the project’s impact and future technology prospects in gardening. |
| Next Up In Landscaping | A preview of upcoming content focused on landscaping lighting systems. |
“`